
Hawthorne Wood Flooring handles hardwood floor installation throughout Hawthorne, CA, serving surrounding cities including Del Aire, Lennox, Alondra Park, Lawndale and West Athens. With more than 20 years of laying wood floors in local houses, apartments and condos, we treat installation as the last step of a job that starts with the subfloor, the moisture readings and the layout.
A new floor fails for reasons that are almost always decided before the first board goes down: wood installed too wet or too dry, a subfloor that flexes, a slab that gives off moisture, or boards packed tight against a wall with no room to expand. We check each of those, write down what we find and only then order material, so the floor we quote is the floor that lasts.
We install both solid and engineered hardwood, prefinished and site-finished, and we plan transitions, door clearances and trim from the start. The result is a floor that sits level with the rooms around it and looks finished at every edge.
Preparing the Subfloor and the Wood
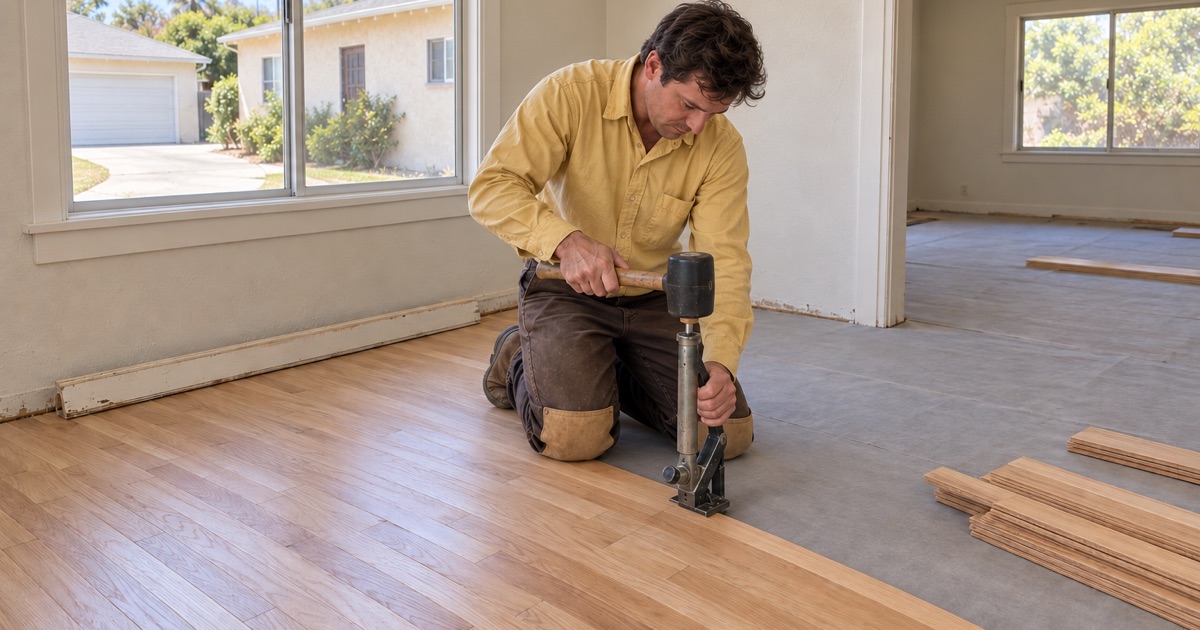
Checking the Subfloor Before Material Is Ordered
We open the floor where needed and check the plywood or plank subfloor for soft spots, water damage and loose fasteners, and check a slab for flatness and cracks. Problems found now cost far less to fix than after the new floor is in, when they show up as squeaks, dips or boards that will not stay down.
Flatness is checked against the manufacturer’s tolerance and the NWFA installation guidelines. High spots are sanded or ground, low spots are filled, and loose sheathing is screwed down tight to the joists.
Acclimation and Moisture Content
Wood gains and loses moisture until it matches the air around it. We check the moisture content of the new boards and the subfloor with a moisture meter and follow the manufacturer’s acclimation instructions, so the boards are installed close to the conditions they will live in rather than shrinking or swelling afterwards.
The readings go on your estimate. If the numbers are too far apart, we wait, rather than installing on the day the material happens to arrive.
Choosing How the Floor Is Fastened
Nail-Down Installation Over Plywood
Solid hardwood over a wood subfloor is traditionally blind-nailed through the tongue with cleat nails or staples, spaced to the manufacturer’s schedule. This gives a solid, quiet floor that can be sanded and refinished many times. It is the most common method in raised-foundation houses.
Fastener spacing matters more than most people realize. Too few nails and the boards move and squeak, too many near the ends and the tongues split. We follow the spacing for the board width and use a vapor retarder paper over the subfloor where the manufacturer calls for one.
Glue-Down and Floating Installation
Over concrete, engineered wood is usually glued down with a moisture-resistant adhesive or floated over an underlayment with a vapor retarder. Glue-down gives a solid feel and low height. Floating is faster and suits some upstairs units, where an acoustic underlayment can reduce noise for the neighbor below.
Before either method goes over concrete, the slab is tested for moisture with the ASTM F2170 in-situ relative humidity method or a calcium chloride test. The readings decide which adhesive or vapor retarder is needed, and they are the difference between a floor that stays down and one that releases in its first wet winter.
Layout, Trim and Transitions
Board Direction and Starting Lines
Boards usually run the length of the main room or toward the main source of light, and they generally run across the floor joists for strength. We snap a straight starting line off the main walls, since rooms are rarely square, and plan so the last row against the far wall is not a thin sliver.
Where the new floor continues into hallways and adjoining rooms, we plan the whole run before starting so the boards stay straight through each doorway. Mixing lengths from several boxes as we go avoids the repeated patterns and clustered end joints that make a floor look manufactured.
Expansion Gaps and Molding
Every wood floor needs an expansion gap at the walls and fixed objects so it can move with the seasons. We leave the gap the manufacturer requires and cover it with baseboard or shoe molding. A floor installed without it can buckle against the walls the first time humidity rises.
Reducers, T-Molding and Door Clearances
Where hardwood meets tile, carpet or another floor, a reducer strip or T-molding bridges the height difference and covers the gap. We plan those transitions to fall under doors and at natural room breaks. Doors are trimmed where the new floor is higher, so they swing freely without scraping the finish.
Species and Board Width
Oak, Hickory, Maple and Walnut
White oak and red oak remain the most popular because they wear well and take stain evenly. Hickory is harder and hides wear, maple is hard but pale and prone to blotching under stain, and walnut is rich in color but softer. We compare Janka hardness ratings with samples so you can weigh durability against appearance.
If you are adding hardwood next to an existing floor, we identify that species first. Matching red oak to red oak, at the same width, lets the new rooms read as part of the original house, especially once both are sanded and finished together.
Strip, Plank and Wide Plank Boards
Narrow strip flooring suits many mid-century houses and matches existing floors. Wider planks show more grain and fewer seams but move more with moisture, so wide solid boards need extra care with acclimation, and wide engineered boards are often the safer choice over a slab.
- 20+ Years With Wood Floors
- Written, Itemized Estimates
- Low-VOC South Coast Finishes